2. Connecting CXPerium to Chatbot
After opening an account at CXPerium, the following settings need to be configured on the CXPerium website to work in coordination with CXPerium throughout the Chatbot chat process.
2.1 Integration Settings
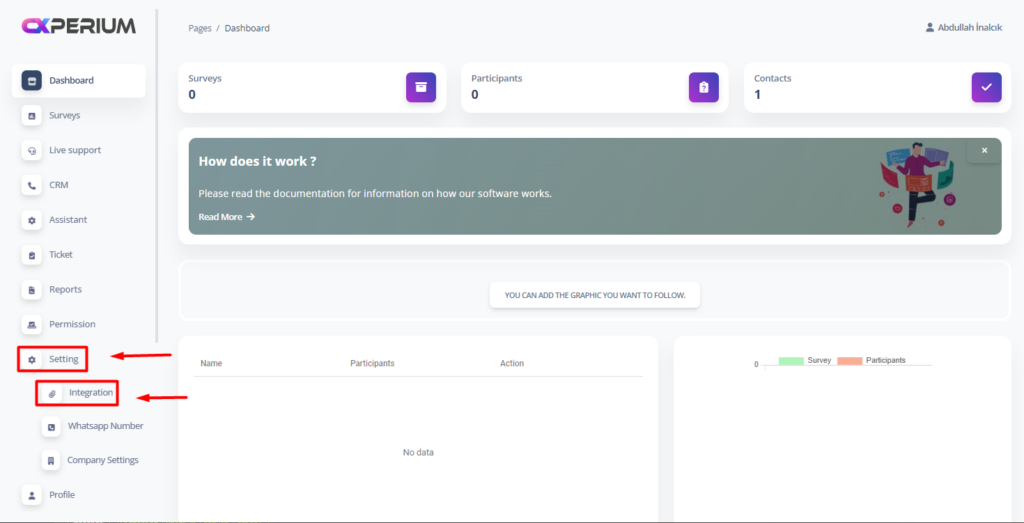
The Integration settings under the Settings tab should be configured.

2.1.1 Webhook Integration Settings
There is an “Api key” on the integration page. (If “Api Key” does not appear when logging into the system for the first time, “Api Key” is created by clicking the “Generate” button).


A new file named “.env” is created in the folder where the “env.sample” file is located in the main directory of the project.

Inside the created “.env” file, the api key from the Integration page is added and saved as follows;
API_KEY=”API key taken from the integration page”
When adding the API key, there should be no space on the right and left.

2.2 Adress Settings
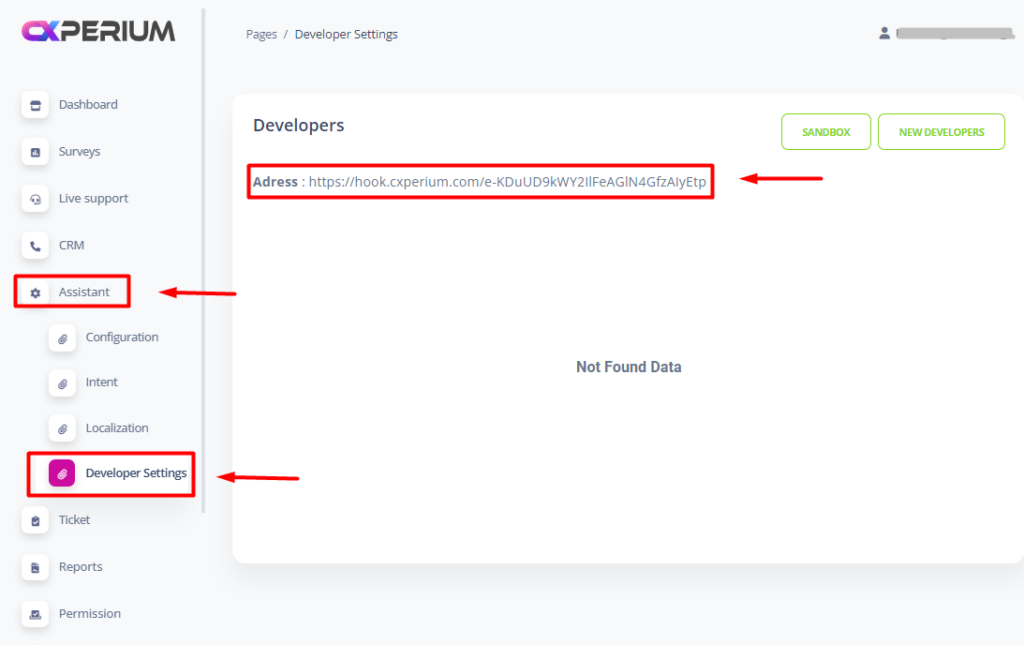
The Developer Settings page opens under the Assistant tab.

When you arriving on this page, the Address information located in the top left corner will be generated.

The Address information is added to the “.env” file created in Section 2.1.1 as follows and saved. When adding the Address information, there should be no spaces before or after it.
CALLBACK_URL=”The Adress taken from the developer settings page”
